- FEATURES
- SMS
Mail merge newsletters and templates

Personal touch
Save time with templates
Unlimited custom fields
Create smart templates using mail merge labels
Sign up in the comments
The message will become more personal if you include the recipient's name in your text. The personal touch leads to better interaction in all areas.
Import custom fields from Excel and CSV
You don't need to create mail merge fields manually; You just need to import contact information and mobile numbers from Excel or CSV files.
Customized scheduled reminders
By sending special files and to mobile phones, you can send scheduled notifications to everyone without any work.
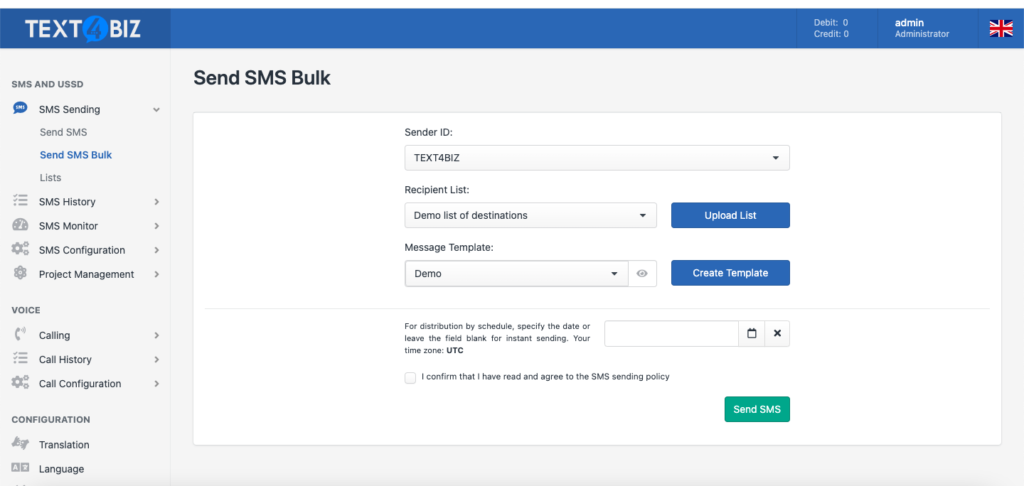
Bulk messaging template
Use direct mail to send thousands of personalized newsletters to your customers using a single template; Perfect marketing in minutes.
Learn how companies like yours use Text4Biz

CASE STUDY
“These days, Text4biz is a acute basic of our company. We anticipation this was the best advance of activity aback we accustomed the antecedent argument aback in 2020.”

CASE STUDY
“Not only has Texr4biz improved our sales conversion rate, but it has also allowed us to establish a more personal connection with our clients..“
Find out how the US-based children’s clothing company improved its communications and conversion rates with Text4biz.

CASE STUDY
“We saw a zero effort, extremely dependable, and steady service with Text4biz's installation, which enabled us to advance our product..“

CASE STUDY
“We're glad Text4biz was found. Our work is made so much easier by the simplicity and ease of use, which also helps us to project the professional image we want to uphold.”


Frequently asked questions
Personalized messages can be sent to several recipients by using mail merge tags. There are five default tags available in the Text4Biz SMS web app: first name, last name, company name, mobile phone number, and email address. To send personalized bulk SMS messages, follow these steps for creating and utilizing mail merge tags:
Step 1: Use custom fields from the Contacts -> Custom Fields tab to create your own mail merge templates.
Step that is required: You must fill out any new custom fields and integrate the fields from your file with your Text4Biz custom fields when importing contacts to your Text4Biz account.
Step 2: Once you have added relevant data to all custom fields, you can start creating bulk SMS. Test your mail merge name tags by sending bulk text. Click New Message, add recipients, and compose your message using SMS tags. Click Send.<br><br> Step #3: Go to the History tab to view all sent messages. You can see that the mail merge tag has been replaced with the relevant data and the bulk text has been customized.
For customers who prefer a desktop app, we’ve added mail merge and SMS templates to Text4Biz’s SMS Messenger. Here is a step-by-step guide to sending form letter tags or templates via bulk SMS.
To set up custom fields: Go to Tools -> Settings -> Custom Fields. Text4Biz SMS software allows you to create up to 6 fields. Name your custom field and click Save. You can now import contact details using custom fields to send personalized bulk SMS messages.
To set up SMS templates: Sign in to your desktop app and access the Templates menu. Click Create new template, compose your message, name it, and save it. You can edit, use, or delete templates at any time. Note that you cannot insert mail merge tags directly into SMS templates.
Send text using mail merge tags and SMS templates: Click Compose to start composing your message. Add recipients and compose your message, or go to Message -> Insert Template to use predefined text. Add tags to your message by going to Message -> Insert Tag. Click Send.
For web platforms: Yes. You can insert tags directly into your text message templates.
For desktop applications: No. You can only add plain text to message templates. Fortunately, inserting an SMS template allows you to add mail merge name tags to your messages.
On the web platform: Go to Contacts -> Custom Fields and click the gray wheel icon to edit or remove tags.
In the desktop application: Go to Tools -> Preferences -> Custom Fields. To remove days, leave the field blank.
